
We all know one of the fastest ways to give your room a dramatic makeover is by changing your wall color. Wall paint is relatively inexpensive if you’re only doing one room. And you can usually do the work yourself. It’s a great DIY project that makes a big design difference that you won’t need to agonize over. Still, even that tried-and-true method of updating your spaces can start to feel a bit stale, especially if you’ve been a frequent painter over the years. So we’ve got a few wall design projects that you can do yourself to really spice up your home and add some much-needed flavor to tired spaces.
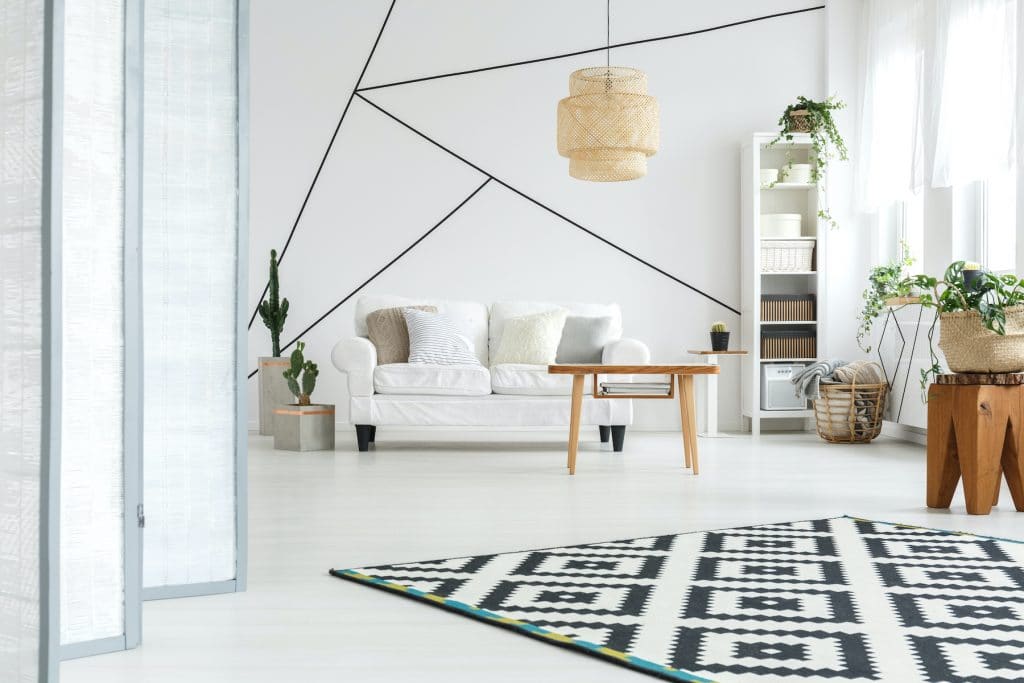
1. GEOMETRIC DESIGN
This is one of those DIY paint projects where you really don’t need special skills or even special materials beyond paint, a brush, and some painter’s tape. Depending on how serious you want to be about the straightness of your lines, you may want to try using chalk line as a guide — particularly if you’re working solo. Although two people with painter’s tape can do a fairly good job marking off a straight line. The key to this project is to have a bit of your wall color handy so you can touch up any little errors and you’re good to go. Create the geometric shapes of your dreams and finish this project in an afternoon!
Supplies you need for this look: paint, paintbrush, painter’s tape, tape measure
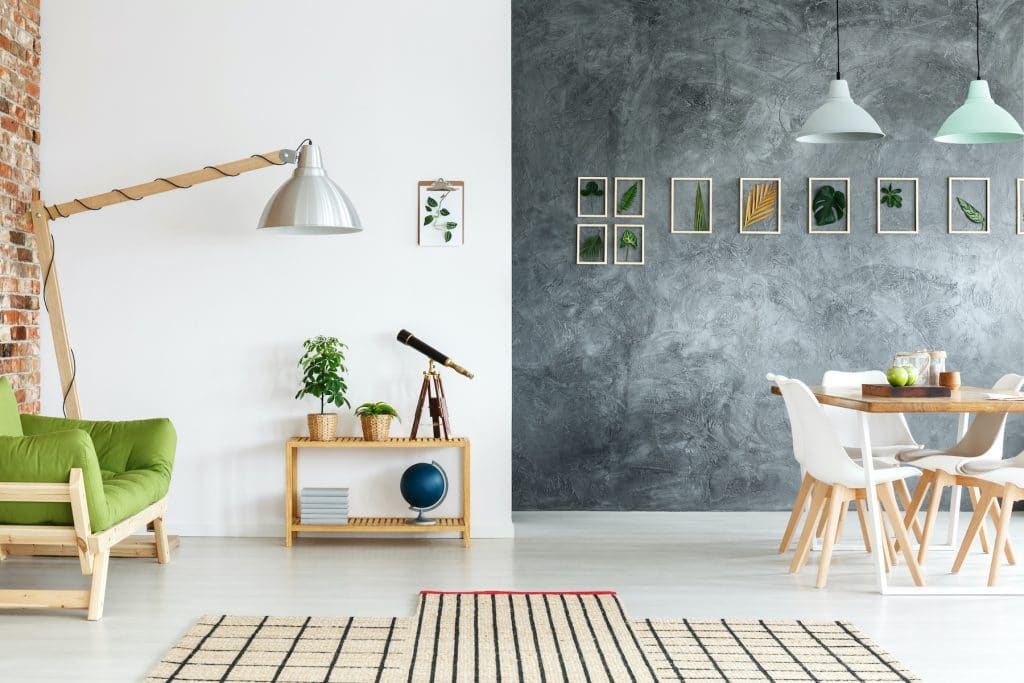
2. FAUX CONCRETE
This look is a real stunner, especially on an accent wall. While you’ll want to vary your technique depending on the exact look you’re going for and the amount of actual texture you desire, this look can generally be done with 2-3 shades of white and gray paint, paint rollers and/or paintbrushes, rags, and a spray bottle filled with water. You’ll start with a base coat of a lighter color and then water down and roll, or dry brush, darker colors on top, using your spray bottle to loosen up and blend spots so that your base color comes through in spots to give your wall that concrete look. Check out your favorite DIY YouTubers or bloggers for tips on how to achieve different styles.
Supplies you need for this look: white & gray latex paint (2-3 colors), paint roller or paintbrush, rags, spray bottle
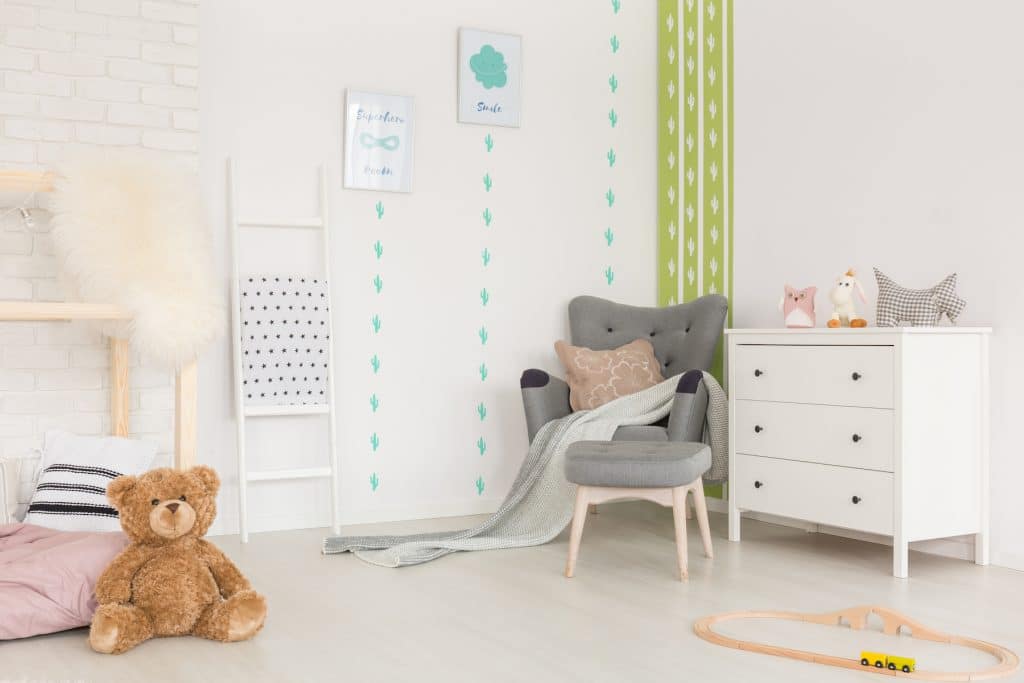
3. STENCIL STRIPES
If the idea of freehanding a drawing or mural terrifies you, stencils are a great option. They’re a great way to add a specific symbol, look, or motif when art isn’t your strong suit. For this particular look, you use a smaller stencil to create stripes on your wall. We love this particular look because it doesn’t even go to the ceiling everywhere, just as high as the artwork. The playful look this achieves is all about a feeling and not about strict lines and exact spacing. It’s a great example to show how you can free yourself from concerns about perfection when tackling a decorative paint job. Just grab a stencil and a can of paint and do your best!
Supplies you need for this look: stencil, paint, paintbrush, painter’s tape
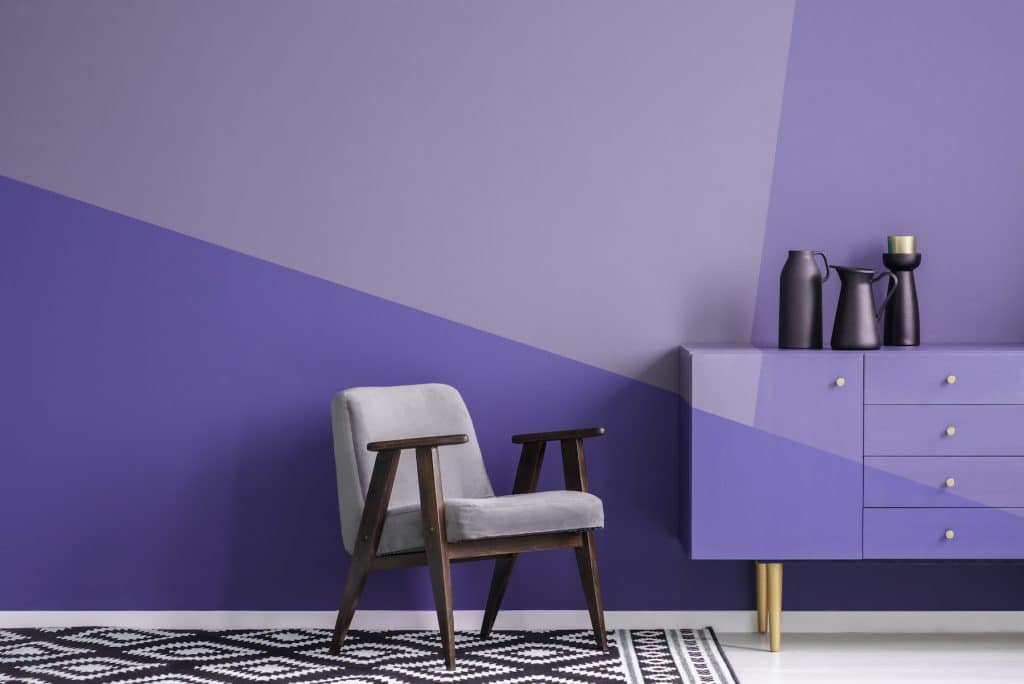
4. COLOR BLOCK
This look can be a real showstopper if you play your cards (and your colors) right. Decide on a color blocking design shape, tape it off with painter’s tape, choose 2-4 colors with as much or as little contrast as you like, and paint in sections. If you’re not sure how to choose your colors, consider pulling out some markers or colored pencils and doing a mock-up of your concept on paper to see how your choices work together. You can do a whole room in this look, and even include your furniture like in this fun example, but a simple accent wall can make a profound statement on its own.
Supplies you need for this look: 2-4 colors of paint, paintbrush, paint roller, painter’s tape, tape measure
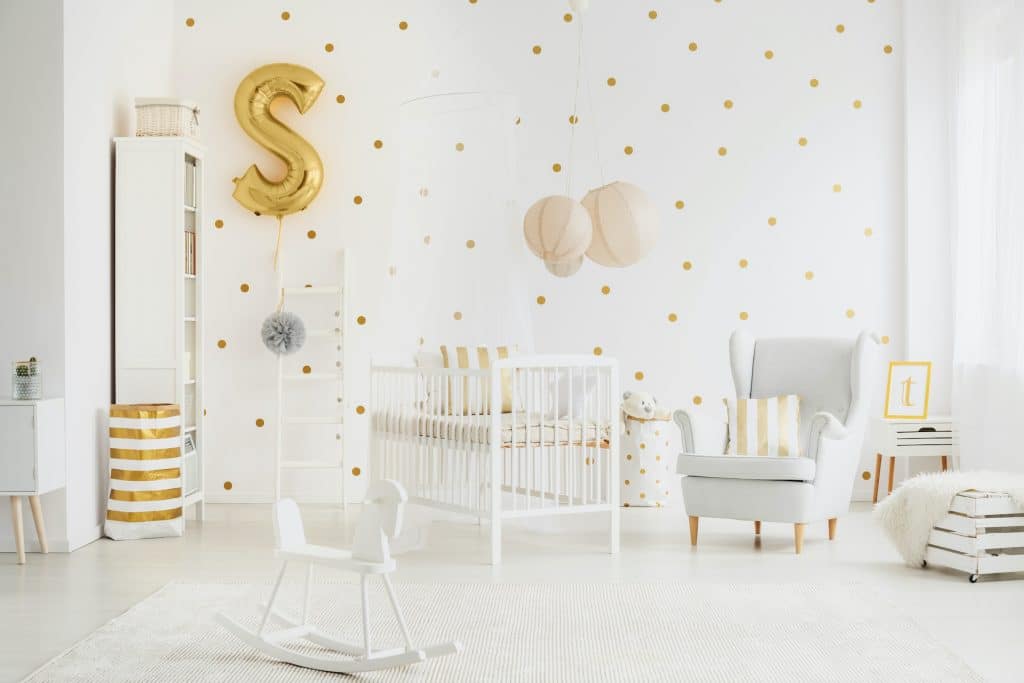
5. DOTS
Talk about a low-stress project for your weekend! We love this freehanded polka dot look. It’s enhanced by the random placement so you won’t need to pull out a tape measure or get obsessed with spacing. Just grab a circle stencil, or if you don’t feel like it, just freehand draw your dots too — why not! You can go big or small with your dots, choose whatever colors you want, and put them wherever you want. This is your look, you can execute it exactly to your taste.
Supplies you need for this look: (optional) stencil, paint, paintbrush
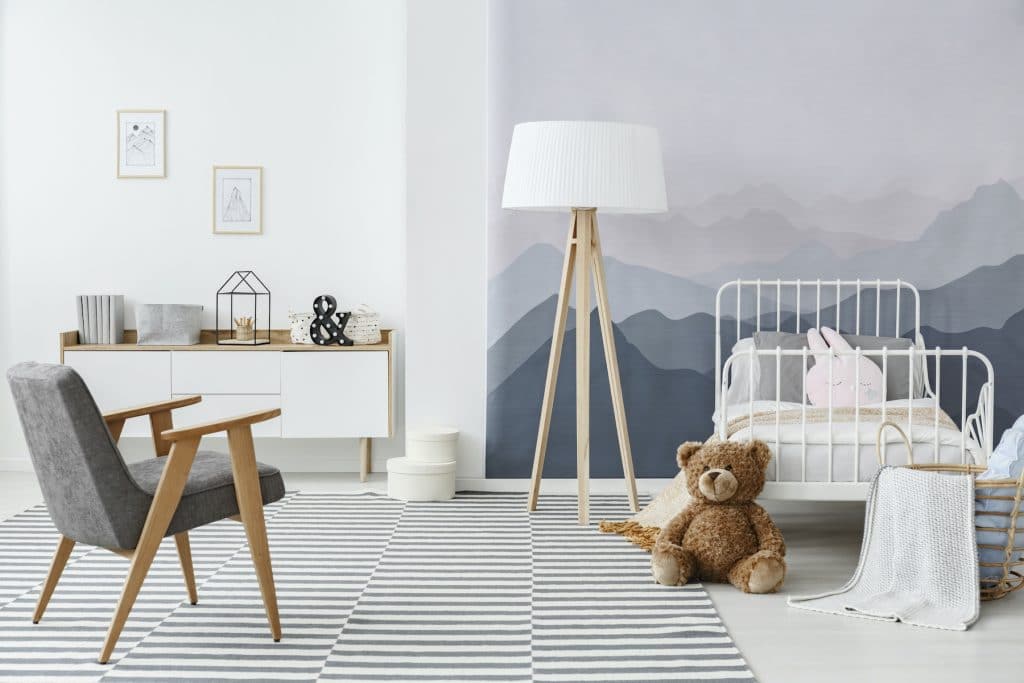
6. GRADIENT LANDSCAPE
This technique doesn’t require much artistic skill, and the success of your finished look really depends more on the colors of paint you choose than anything. If you can freehand or copy some mountains, or waves, or treetops, or anything really in 3-6 layers you can achieve this stunning look. It’s like doing your own mural without all the artistic skill! Just paint your wall in your lightest paint tone and then draw on your design starting with your darkest color on the lowest level and working your way up to your lightest. We suggest buying different colors for each level, but if you’re brave, you could buy just 3 colors (make sure you get latex) and mix them to get in-between shades.
Supplies you need for this look: 3-6 colors of latex paint, paintbrush, paint roller, painter’s tape, pencil

7. VARIATED VERTICAL STRIPES
One of the most difficult things about painting stripes on the wall is making sure they’re all even. So why not just eliminate that headache for this fab DIY look? Paint your wall a base color, tape off several vertical stripes of various widths, and start painting every other stripe with a second color. Try using a chalk line to snap straight lines from floor to ceiling. This look is very sharp with just two paint colors, but you could add more if you wish. To make this project even simpler, you could limit the stripes to just a center section or side section of a wall. Get creative!
Supplies you need for this look: 2 colors of paint, paintbrush, paint roller, painter’s tape, tape measure, (optional) chalk line
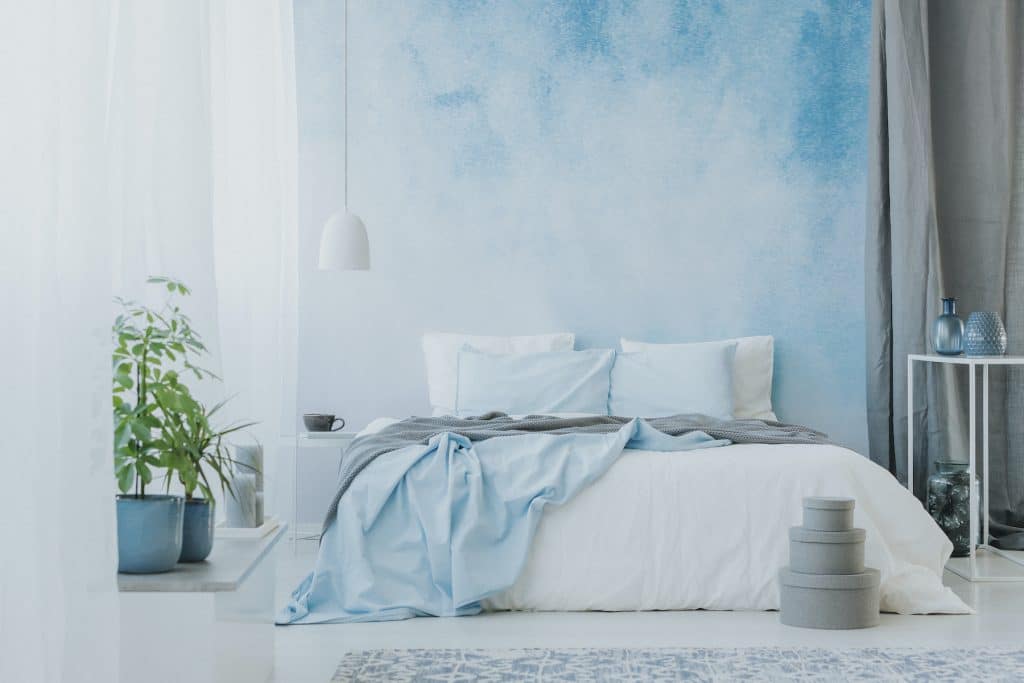
8. OMBRE
An ombre feature wall can really set a mood in your room. The colors can be as bold or as mild as your taste demands. So can the distinctness of your blend. Home decor bloggers have been posting a storm about this style and you can find several techniques to best achieve the looks you want. Most recommend dividing your wall with pencil-drawn horizontal lines, then painting in sections from light to dark. One key tip is to mix your paint shades and dry brush them on at the borders to blend the look from one shade to the next. Paint your wall in your lightest shade as your base, then start at either the top or the bottom and with your dark shade and fade to the lighter shade. A base color and 2 other paint tones are usually recommended, although you can add more shades if you prefer.
Supplies you need for this look: 3 colors of latex paint, pencil, paintbrush, paint roller, painter’s tape

9. FAUX CHAIR RAIL
Sure we all love decorative molding, but sometimes elaborate woodwork doesn’t work with your aesthetic, or installing it would be too expensive. Consider just painting a faux chair rail instead in one clean vertical stripe around your room. We love this thin pinstriped look, but you could go a bit thicker to better the thickness of a chair rail. You could even go with a different wall color above or below your faux chair rail if you really want to get wild. This is a simple look you could easily achieve in a weekend with just paint, a pencil, a paintbrush, a measuring tape, and painter’s tape. If you’re worried about keeping your lines straight, you could try using a laser level or chalk line.
Supplies you need for this look: paint, paintbrush, pencil, painter’s tape, tape measure, (optional) chalk line

10. DECONSTRUCTED OMBRE
So if you loved the idea of an ombre wall but aren’t sure you have the skills to achieve the look, consider this deconstructed version instead. Essentially you paint part of your wall in a horizontal line, then you sort of try to paint the rest letting your roller run dry at the border between colors, or just dry brushing at the borders. You can’t go wrong with this technique because it’s supposed to look like an unfinished ombre. This look is best with just two colors, but you could do more if you feel inspired!
Supplies you need for this look: 2 colors of latex paint, paintbrush, paint roller